How to Use a Compass Map in the Field
If your phone dies, loses signal, or gets smashed on a trail, you find out fast whether you actually know how to use a compass map. This is one of those skills that sounds old-school right up until it keeps you from walking the wrong ridge, missing a road, or burning daylight in bad weather.
The good news is that basic land navigation is not complicated. You do not need to be a backcountry guide or a hardcore prepper to learn it. You need a decent baseplate compass, a paper map that matches your area, and enough practice to use both together without second-guessing every step.
What you need before you start
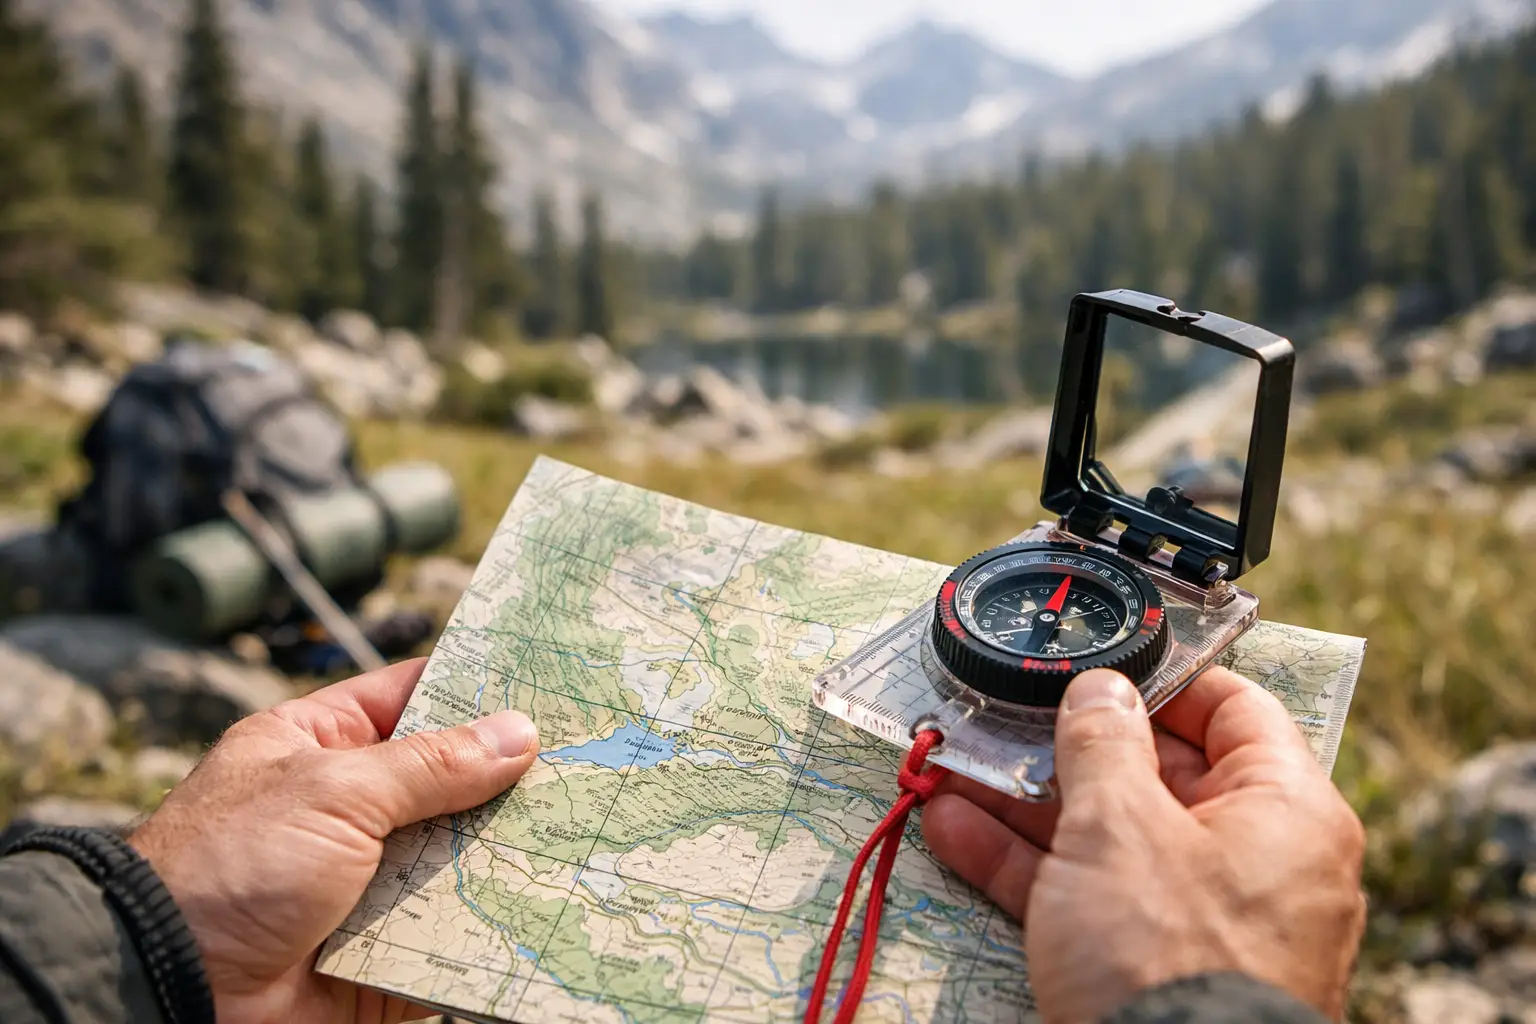
For real-world navigation, skip the junk compasses sold as novelty survival gear. Use a baseplate compass with a rotating bezel, clear direction-of-travel arrow, and readable degree markings. A sighting compass can be even better if you plan to navigate in rough country, but a basic quality baseplate model is enough for most beginners.
Your map matters just as much. It should be a proper topographic or trail map for the area you are traveling through, not a vague brochure map from a park office. Scale matters too. A detailed map gives you terrain features, roads, creeks, elevation lines, and landmarks you can actually use.
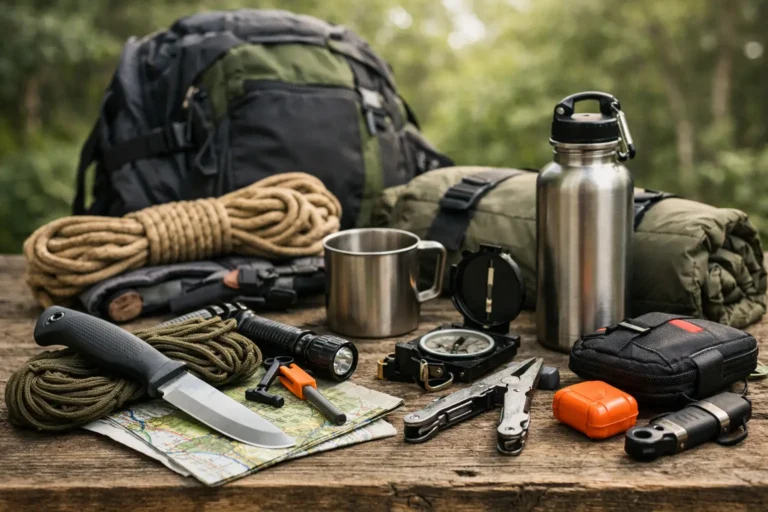
If you are building out a real emergency kit, this is one place where cheap gear can cost you time and accuracy. A compass needs to hold a steady needle, have clear markings, and survive getting bounced around in a pack, glove box, or bug-out bag.
How to use a compass map step by step
When people say they want to learn how to use a compass map, they usually mean one of three things. They want to orient the map, figure out where they are, or travel in a chosen direction. Those are the core jobs, and once you can do them, the rest starts making sense.
Start by orienting the map
Lay the map on a flat surface if you can. Put the compass on top of the map. Turn the map so the top of the map points generally north. Then rotate the compass bezel until the orienting lines match the north-south grid lines on the map, if your map has them.
Now hold the map and compass together and turn your whole body until the magnetic needle lines up with the orienting arrow inside the bezel. Once the red needle sits in the outline of the orienting arrow, your map is lined up with the terrain around you.
This sounds basic because it is, but it is the first thing a lot of people skip. If the map is not oriented, every hill, creek, road, and trail junction can start to feel wrong. Orient the map first and the landscape becomes a lot easier to read.
Find your location with terrain and landmarks
If you already know your starting point, great. Mark it mentally and keep moving. If you do not, look for obvious terrain features around you like a ridgeline, stream crossing, trail intersection, pond, road bend, or power line cut.
Then match those features to the map. Contour lines help here. A steep slope, saddle, valley, or hilltop has a shape on the map. If you can identify two or three clear features around you, you can narrow down your position pretty fast.
This is where beginners often get frustrated. They look for one exact match instead of building a picture. Think in layers. You are near a creek. The creek is east of a hill. The trail bends south before crossing the water. Stack enough clues together and your location becomes obvious.
Take a bearing from the map
If you know where you are and where you want to go, place the edge of the compass on the map so it connects your current position to your destination. Make sure the direction-of-travel arrow points where you want to go, not back toward your starting point.
Now rotate the bezel until the orienting lines inside the compass housing line up with the map’s north-south lines. Keep the bezel set. Pick up the compass and hold it flat in front of you. Turn your body until the red needle lines up with the orienting arrow. The direction-of-travel arrow is now pointing along your route.
That is the basic move. It is simple, repeatable, and good enough for a lot of trail, woods, and off-grid travel.
Follow the bearing without drifting
Do not stare at the compass while walking. That is how people trip, miss terrain changes, and slowly drift anyway. Instead, line up the needle, look up, pick a landmark in the distance that sits on your bearing, and walk to that point. Then repeat.
In open terrain, this might be a tree, rock, fence post, or notch in a ridge. In thicker woods, use shorter legs between visible points. If you try to walk a perfect line through brush without checking often, you will wander.
If you are traveling with another person, this gets easier. One person can stand on bearing while the other moves ahead to the next visible landmark. That leapfrog method is fast and accurate.
Magnetic declination matters, but not always equally
Declination is the difference between true north on the map and magnetic north on your compass. Depending on where you are in the US, that difference might be small or large enough to throw you off badly over distance.
For short trips on marked trails, some people ignore declination and get away with it. For off-trail travel, big terrain, poor visibility, or longer distances, that is a mistake. If your compass lets you adjust declination, set it for your area before heading out. If it does not, learn whether you need to add or subtract degrees when taking bearings.
This is one of those it-depends topics. A few degrees will not ruin a short walk to a visible road. It can absolutely put you in the wrong drainage or on the wrong side of a ridge if you are moving cross-country.
Common mistakes that get people turned around
The biggest mistake is trusting the compass without checking the map, or trusting the map without checking the terrain. Compass and map are a pair. Use both.
Another common problem is holding the compass near metal. Knives, firearms, belt buckles, vehicle hoods, watches, phones, and even some packs can interfere with the needle. If the needle looks jumpy or wrong, move away from metal and check again.
People also reverse their direction-of-travel arrow more often than they admit. If your bearing seems to send you somewhere that makes no sense, stop and verify that you did not plot the route backward.
Then there is panic. That is the one that does the most damage. When someone gets unsure, they speed up, stop checking, and start guessing. Slow down. Reorient the map. Confirm one terrain feature. Then the next. Slower and correct beats fast and lost.
A simple field routine that works
Before you leave camp, the truck, or the trailhead, orient the map and identify your start point. Look at major terrain features between you and your destination. Note handrails like creeks, ridges, roads, or fences that can help keep you on track. Also note backstops, which are features beyond your destination that tell you that you have gone too far.
That routine keeps navigation from becoming a constant puzzle. You are not just following a line. You are moving through a terrain plan. That is how experienced outdoorsmen stay oriented even when they are not staring at the map every minute.
Gear that makes this easier
A quality compass is the first buy. After that, a waterproof map case, rite-in-the-rain style notebook, pencil, and a backup light for reading your map after dark are all worth carrying. If you are serious about preparedness, keep a map and compass in your vehicle kit, not just your hiking pack.
GPS and phone navigation still have value. Use them. Just do not depend on them as your only layer. Batteries die. Screens crack. Signal gets weak. Paper and a good compass do not care.
That is the practical side Dark Justice Survival pushes for a reason. Skills matter more when the gear is simple, reliable, and already in your kit.
Practice before you need it
The best place to learn is not in a storm, after dark, or when you are already behind schedule. Practice at a local park, state forest, or even a large piece of public land with obvious features. Pick a few points on the map, orient it, take bearings, and verify what you see around you.
Keep the first sessions short. The goal is not proving how tough you are. The goal is building a repeatable skill until using a compass and map feels normal.
Once that clicks, you stop treating navigation as a backup plan and start treating it like any other piece of real gear. That shift matters. When you can read terrain, set a bearing, and move with confidence, you are a lot harder to rattle when conditions go sideways.
A compass and map will not make you an expert overnight, but they will make you more capable the next time batteries fail, weather closes in, or the easy route disappears.