
SUPPORTING GUIDE • SOLAR CHARGING BASICS
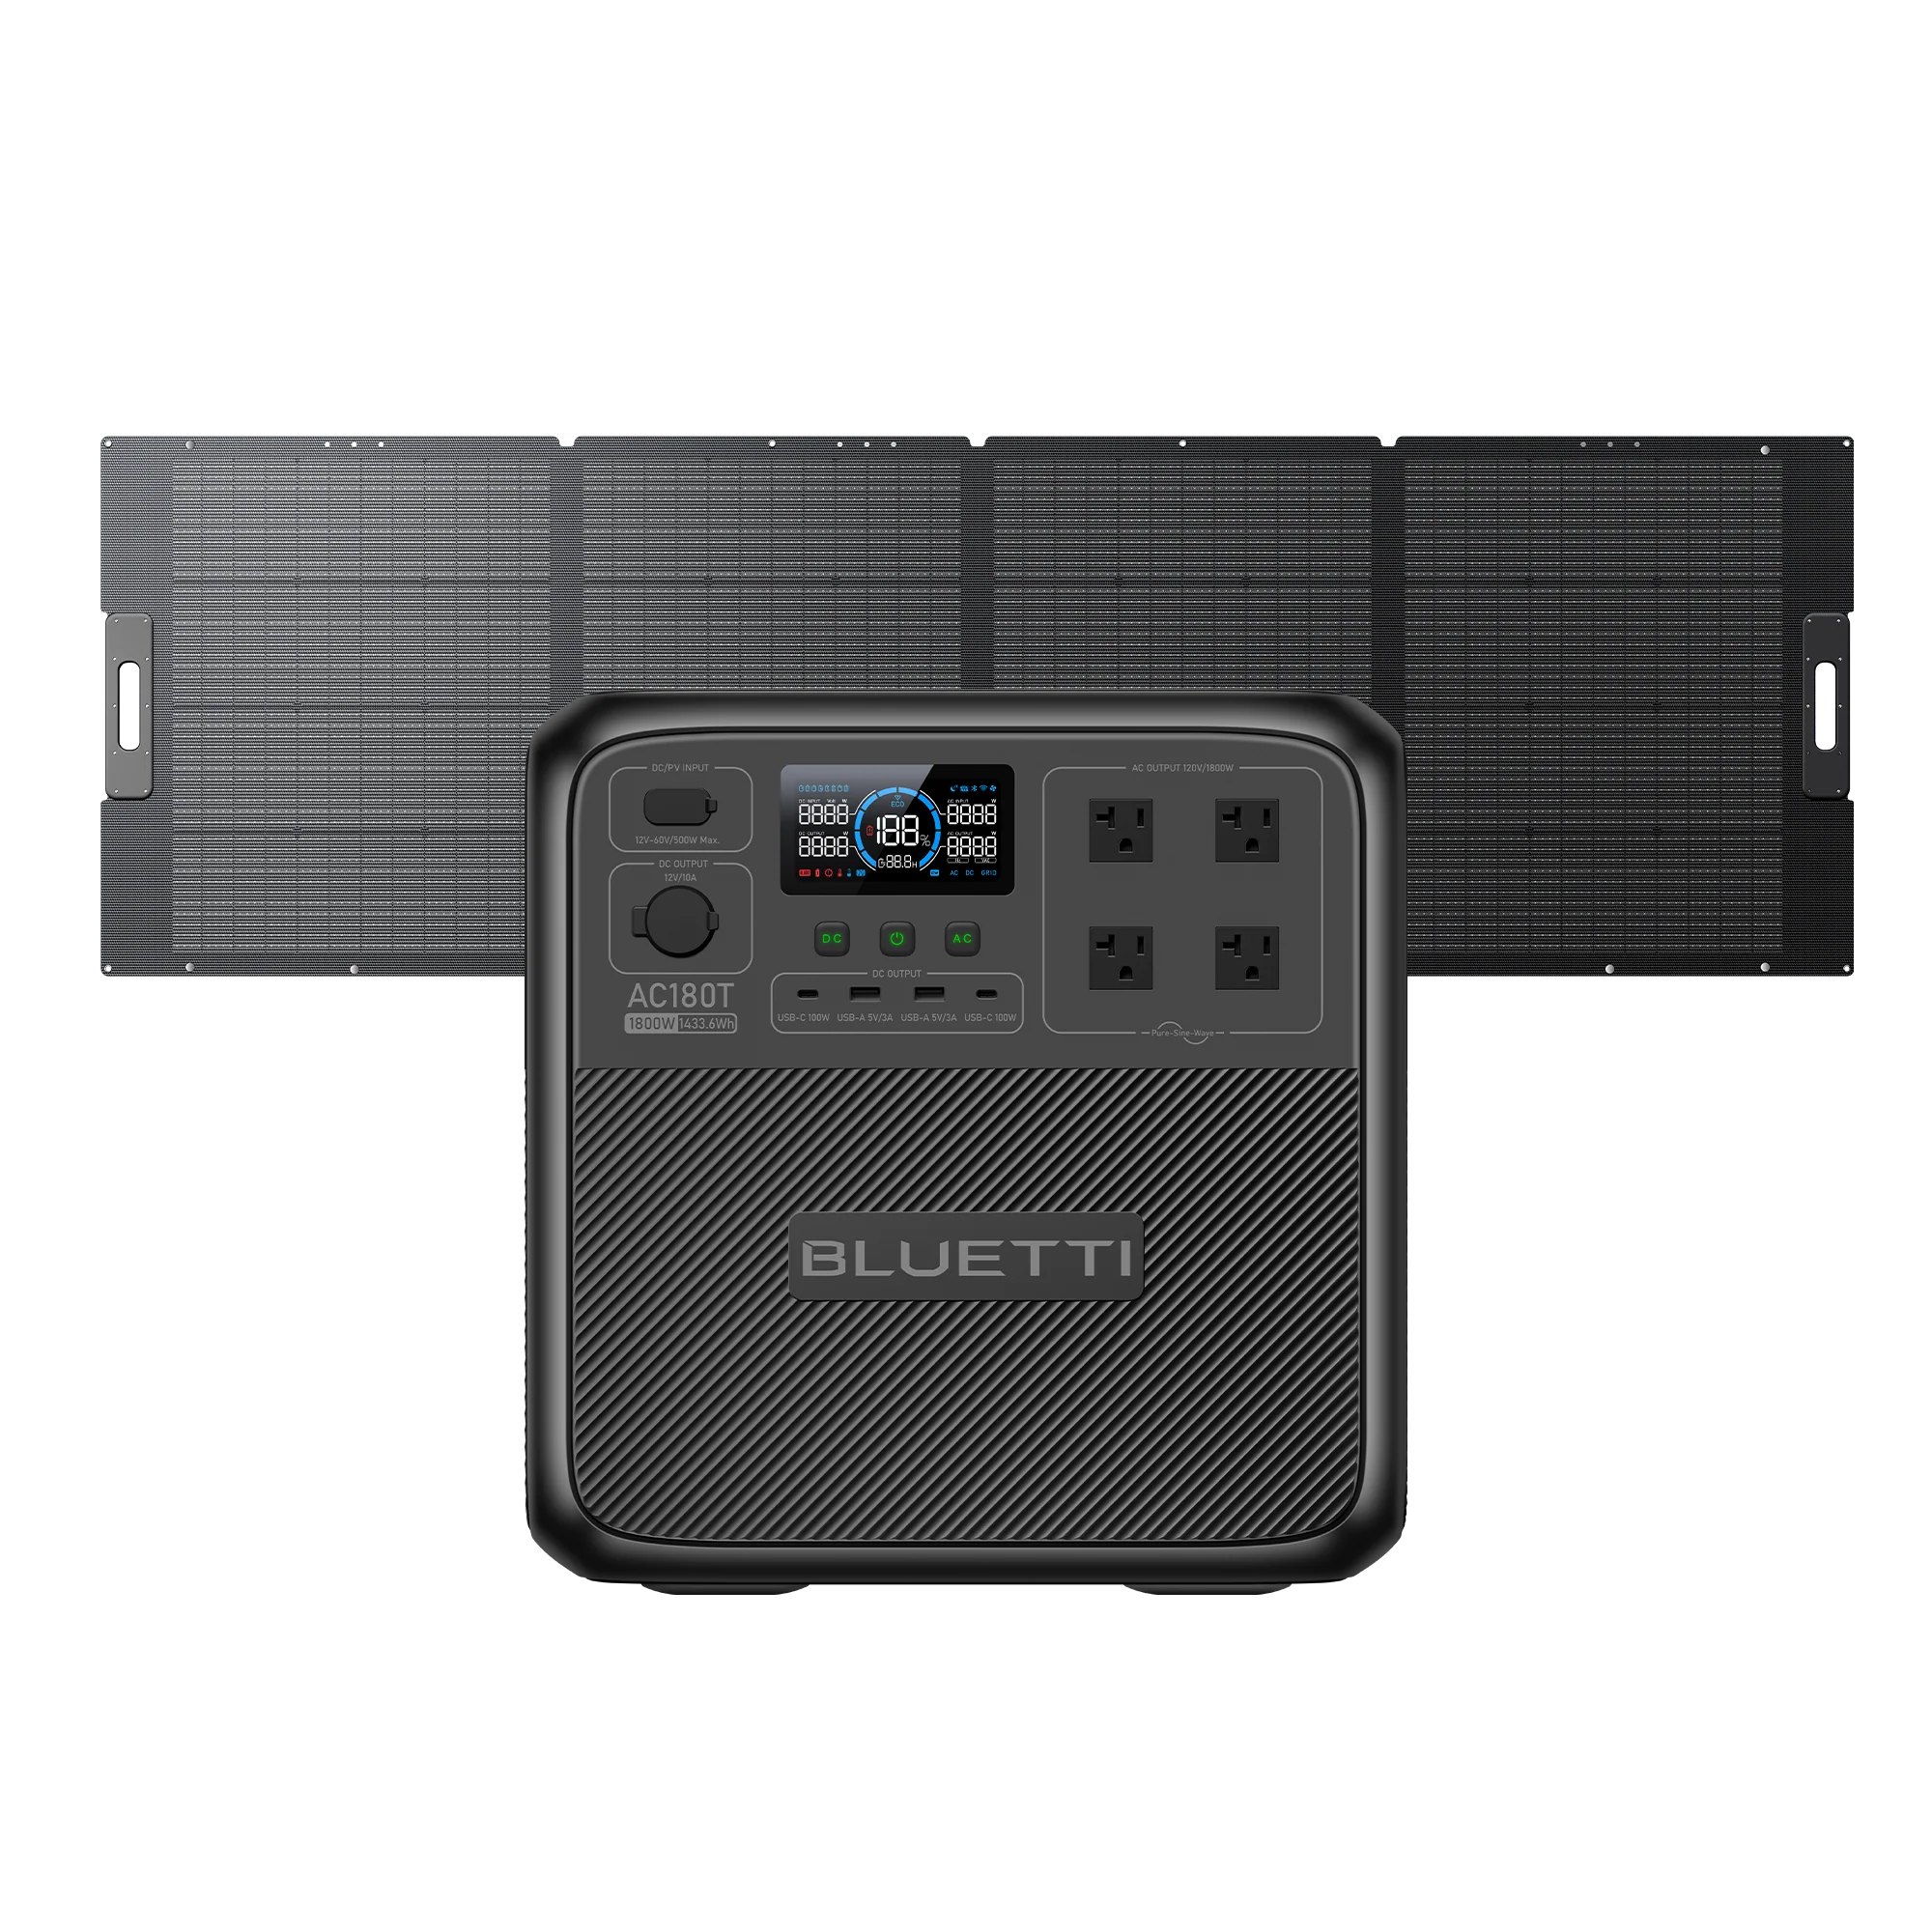
BLUETTI Solar Panels Explained
Solar fails in real setups when people assume “panel watts” equals “all-day watts.” This guide helps you pick the right BLUETTI panel class, set realistic recharge expectations, and avoid buying the wrong bundle for your space.
Quick Answer
Most practical BLUETTI solar setups fall into four panel sizes: 60W, 100W, 200W, and 350W. Small panels are for topping off and light use; bigger panels are for daily recovery (replacing what you used yesterday). The right pick depends on your space (roof/ground), how portable you need it, and whether your goal is “keep it alive” or “fully recover daily.”
 ❯
❯
Panel Sizes in the BLUETTI Ecosystem
These are the common panel sizes you’ll see in BLUETTI bundles and what they usually mean in practice.
| Panel size | Best use | Reality check |
|---|---|---|
| 60W | Topping off small electronics, light battery maintenance, minimal space. | Not a “fridge saver” by itself. Good for trickle recovery, not full daily replacement. |
| 100W | Light-to-moderate daily recovery depending on weather and usage. | Often needs a 2-panel bundle to feel “useful” in real conditions. |
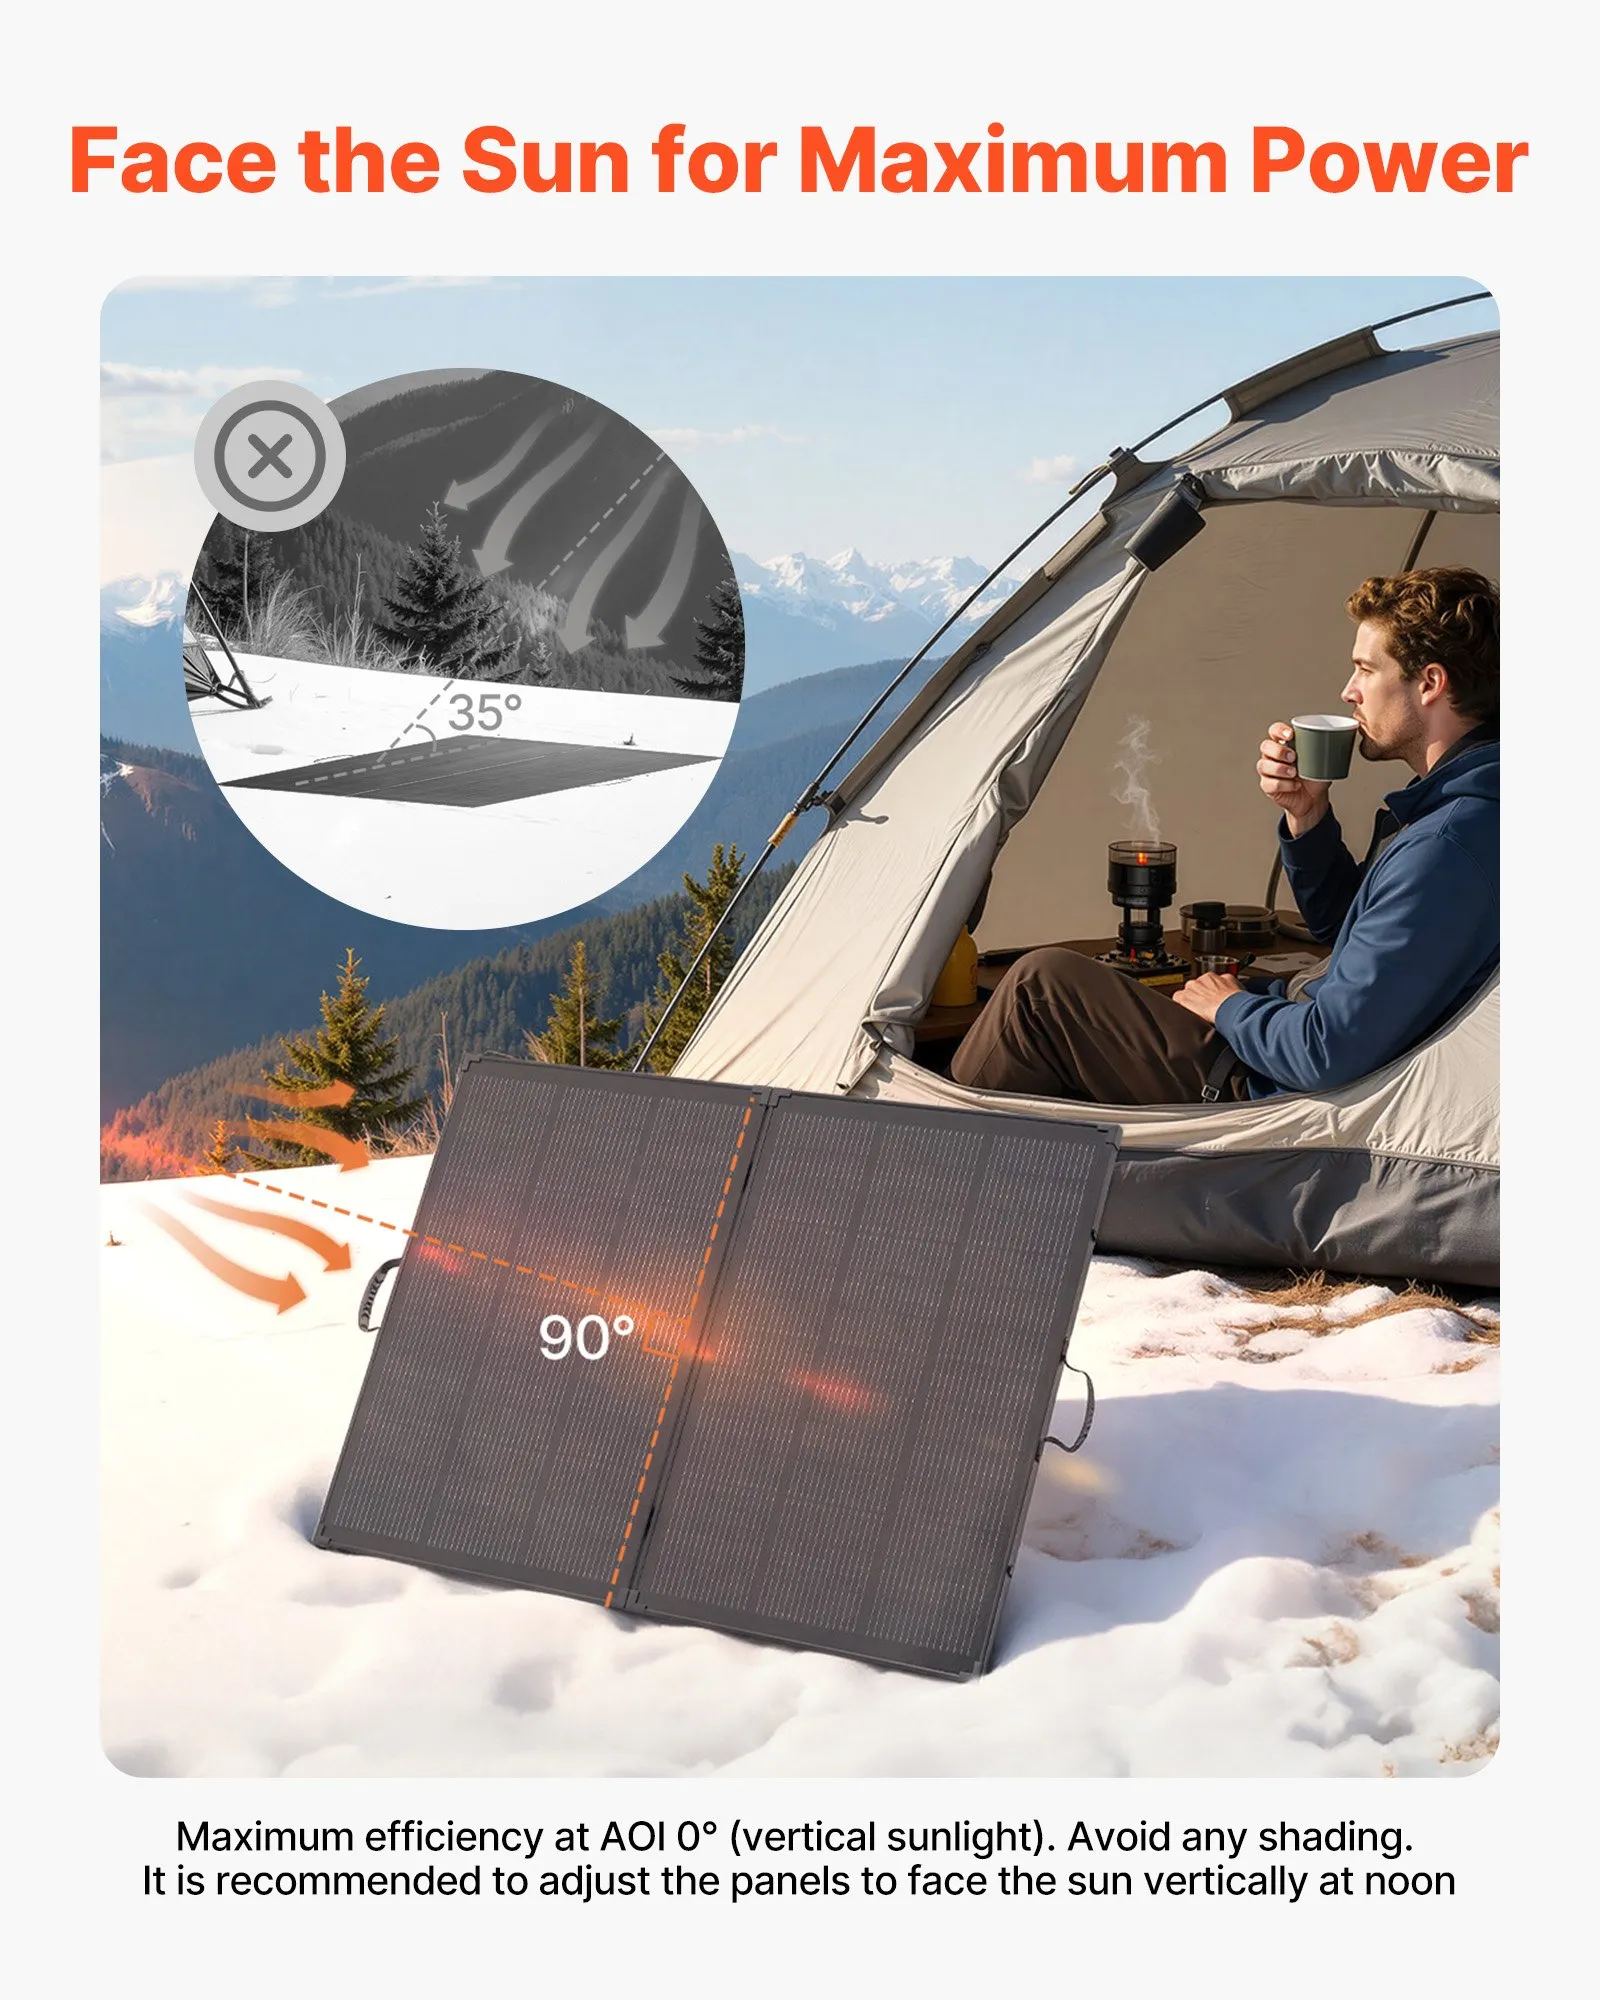
| 200W | Practical daily recovery for many essentials-class loads when deployed well. | Shade/angle matters more than people think. Expect big swings day-to-day. |
| 350W | Higher recovery potential for bigger batteries and heavier daily draw. | Bigger footprint. Great if you have space; annoying if you don’t. |
Common Bundle Picks
The bundles you’ll see most often are 100W–350W classes (single or pairs). Choose based on space and whether you need daily recovery or just slow topping off.
Starter Bundle: 100W Class
Common starting point when space is limited. Works best when you’re realistic about loads and expect “top off + some recovery,” not miracles.
- Best for: phones, lights, small fans, topping off batteries
- Reality: one 100W is often underpowered; 2× helps a lot
- Works when: you manage shade + orientation
Practical Recovery: 200W Class
The “this actually helps daily” class for many real setups when you can deploy panels with decent exposure.
- Best for: keeping up with essentials-class loads more consistently
- Good fit: AC180 / AC180P class usage with reasonable sun
- Reality: placement beats buying more watts you can’t use
High Recovery: 350W Class
Higher recovery potential for bigger batteries and heavier daily draw—if you have the footprint to deploy it.
- Best for: AC200-class planning and longer off-grid runtimes
- Reality: biggest “space vs payoff” tradeoff
- Works when: you can keep panels unshaded and well-angled
Avoid These Mistakes
These are the common ways people waste money and still end up with “dead battery day.”
| Mistake | What happens | Fix |
|---|---|---|
| Assuming nameplate watts = all-day watts | You expect full output for hours and feel like solar “doesn’t work.” | Plan for variability (clouds, heat, angle). Size solar for daily recovery, not ideal lab conditions. |
| Buying one small panel for a big battery | Recharge takes forever; you never catch up after a few bad sun days. | Use 2-panel bundles or larger panels if daily recovery matters. |
| Shade + poor angle | Output collapses and people blame the panel. | Placement and orientation beat buying more watts you can’t actually use. |
| No load plan | You use more than you can replace, then wonder why you’re always near empty. | Reduce load, or increase recharge sources (more panel, better deployment, or other charging). |